Introduction
After having much success with indoor gliders, the Krempetz’s decided to start flying outdoor gliders. As we discussed outdoor gliders with other Outdoor Free Flighters, the word DT came up a lot. At first, we weren’t sure what DT meant or why it was used so much. DT is an abbreviation for De-Thermalizer. It is used on most outdoor Free Flight models so the model doesn’t fly away. Also, it is helpful when trimming out the transition of a glider, since you can DT early, making the glider easier to retrieve. When flying a model outside, typically, you are trying to catch a thermal. If your model catches a good thermal, it will probably fly out of sight unless you have a DT timer which is operating correctly. A DT timer basically changes the flying characteristics of your model, after a preset period of time. The changes will cause the model to land, even though it may be in a thermal.
In a US contest, the scoring for a flight is the amount of time (in seconds) that the model is in the air. For gliders (HLG and Catapult), the best 3 flights out of 6 flights are counted. If you stay airborne for 2 minutes (that is 120 seconds), you made a max. Maxes can be defined as any time period by the contest director, but it’s usually 120 seconds. You would always like to get your model back to fly it again. So, you would really like the model to land sometime just slightly longer than 120 seconds. Therefore, one should set the DT for about 130 seconds.
Knowing this, it might make sense when you ask someone how their flight was, and they respond, "Great, the DT went at 130 seconds and I maxed."
Once you have three maxes, you are in the fly offs. You have six attempts to make the three maxes. Once in the fly offs, you need a max every flight to gain another flight.
Basic Components of a DT
There are 3 basic components of a DT.
- The timer.
- The actuator.
- The trim change action.
DT Timers
The timer is a device that you set so that at a set period of time, it trips the actuator.
There are three basic types of DT timers currently in use.
- Fuses.
- Viscous timers.
- Electronic timers.
Fused Timer
This is a picture of a fused timer. Fuses are very similar to the fuse on a firecracker. Once lit, they burn at a constant rate. The fuse is installed in a metal container, so that when it burns out, the container will prevent fires. Before the burning part of the fuse reaches the metal container, it crosses a rubber band which will break, tripping the actuator. Fused timers were very common years ago, but today they are not the most common timer used. Fused timers have the disadvantage of having to replace the rubber band and the fuse each time the DT is used. Additionally, they are difficult to light.
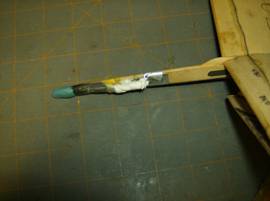
Home-Made Viscous Timer
A viscous timer is a device that drags a wire through a medium like silly putty. This is a picture of a home-made viscous timer. Here, you can see that the spring is supplying the force to move the metal arm through the silly putty. When it reaches the trailing part of the wing, it will trip the actuator. In order to increase the DT’s time, simply add more silly putty or loosen the spring tension. The disadvantage of a viscous timer is the loss of accuracy, due to temperature changes affecting the DT’s time. It is also difficult to add or subtract a small amount of time. A commercial viscous timer is the most widely used DT today, because of its light weight and the fact that parts do not have to be replaced after every use.
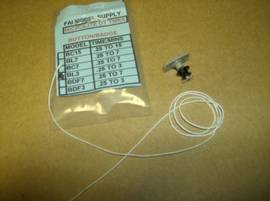
Commercial Viscous Timer
This is a picture of a commercially produced viscous timer unit purchased from FAI Model Supply. The Timer is made by Microlite DT timers and this model is BL3. The string is an elastic cord which is used in place of the spring in the home-made timer. This timer has the same disadvantages of the home-made timer.
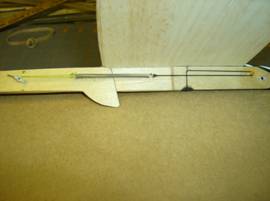
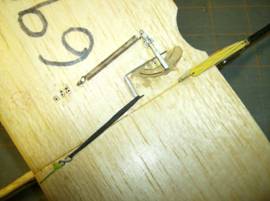
Stan Buddenbohm's Fuselage With Timer
This is a picture of a fuselage purchased from Stan Buddenbohm which has a DT timer incorporated in the fuselage construction. Instead of an elastic cord, Stan includes a small spring to supply the force to run the timer.
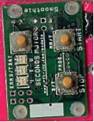
Electronic Timer
This is a picture of one of many types of electronic timers available. Electronic timers work great, however are costly and are much too heavy for use on gliders because they require a battery for power. Hopefully, in the future, they will get smaller and lighter.
The Actuator
The second component used on a DT system is an actuator. The timer trips the actuator, and then the actuator supplies a force to make a trim change. The types of actuators we use are springs, elastic cords, and rubber bands.
The Trim Change
The trim change is something physically changing on the model and causing the model to land. There are many ways to create a trim change. A few common methods include:
- Pop up fuse
- Pop up wing
- Elevator tab
- Drag tab
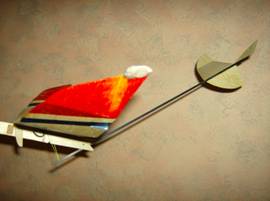
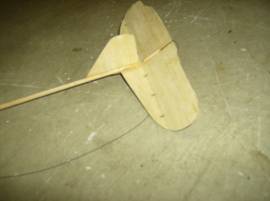
Pop Up Fuselage
This is a picture of a pop up fuselage in its DT state.
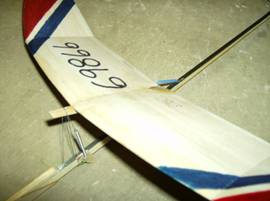
Pop Up Wing
This is a picture of a pop up wing. Overall, the pop up fuse is probably the best way to DT a model. But either of these types of DT must be incorporated in the design of the model.
Elevator Tab
This is a picture of a DT system with an elevator tab, used to DT the model.
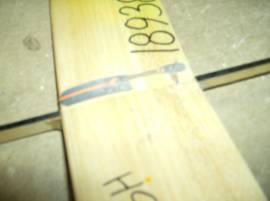
Wing-Mounted Drag Tab (Before DT)
This is a picture of a drag tab in the launch position. The drag tab is made from a pop can and uses the curvature of the can to actuate the drag tab.
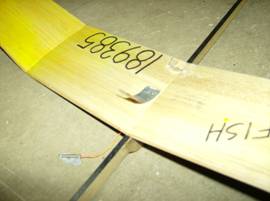
Wing-Mounted Drag Tab (In DT Position)
This is a picture of a drag tab in the DT position.
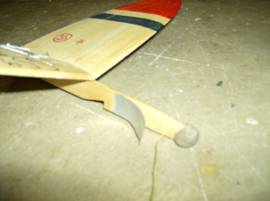
Fuselage-Mounted Drag Tab (In DT Position)
This is a picture of a drag tab on the side of the fuse. When a drag tab is used on the side of the fuse, the model will spiral in when the DT is actuated.
There are other ways that can be used to DT a model, but these are the four most common methods that the Krempetz’s use. We tend to use the pop up fuselage the most.